28 agosto, 2009

Mount Internal Partitions on Boot

"I'm so [lazy]" - Nirvana

Linux is a nice safe place to work. But in my years of working in Windows I just got in the habit of ALWAYS keeping my data on a separate partition from my operating system, so I have a safe Data partition that would be nice to not have to mount every time I boot up in Ubuntu. I found a nice step-by-step tutorial to do exactly this. Basically you just add a small program called "NTFS Configuration Tool", and then follow the simple instructions. If you want more details, the instructions are very easy to follow.

Etichette:

26 agosto, 2009

Chromium & Flash

“The gleam of chrome is as irresistible to a man as the word "sale" is to a woman” - Anonymous

Firefox...nope...does not cut it in my opinion. Too much overhead. Too slow. Plugins crash. I like Chrome, and no matter how hard I try...Firefox just isn't the same. But now Chromium seems to be stable enough, so here are some instructions to install it on Ubuntu Jaunty (9.04) in slightly more comprehensible terms:

1. Add the repository
a. System > Administration > Software Sources
b. Click on the "Third Party Software" tab
c. To add the repository, Click "Add" and copy:

deb http://ppa.launchpad.net/chromium-daily/ppa/ubuntu jaunty main

d. Click "Add Source"
e. Open Applications > Accessories > Terminal
f. To enter the key, copy (Ctrl+C) & paste in Terminal (Ctrl+Shift+V)

sudo apt-key adv --recv-keys --keyserver keyserver.ubuntu.com 4E5E17B5

g. Go back to the "Software Sources" window and click "Close" and then "Reload" in the pop-up

2. Install Chromium
a. To update the source list, in the Terminal window type

sudo aptitude update

b. The install the themes by typing

sudo aptitude install chromium-browser

3. Install Flash
a. In Terminal navigate to the Chromium plugins folder by typing

cd /usr/lib/chromium-browser/plugins

b. Link the flash plugin

sudo ln -s ../../flashplugin-installer/libflashplayer.so

4. Create a fully functional shortcut - right now if you click on Applications > Internet > Chromium Web Browser the application will open, but flash won't load/work, this is why this last step is necessary.
a. Drag the Icon from Applications > Internet > Chromium Web Browser to the top panel
b. Right-click on the new panel icon and select "Properties"
c. In the "Command" text-box add the following at the end

--enable-plugins

d. Click "Close"

Now you should be able to open a fully functional version of Chromium from the panel!

P.S. Though it is slightly more advanced, you can also enable plugins on the menu launcher for Chromium. System > Preferences > Main Menu under Menus select Internet, under Items select Chromium, then select Properties and follow 4c & 4d.

Etichette:

25 agosto, 2009

Pimp my Ubuntu!

"We know you like cars so we put a car in your car so you can drive while you drive." - Xzibit

My dear wife is "open to using Linux"...mostly because Windows just commited suicide, and she was lucky enough to already have Ubuntu Jaunty (9.04) already on her machine. She likes the way mine looks, so the first thing she wants is some cool backgrounds and themes. The best I have found are from François Vogelweith.


Unfortunately, beyond the instructions being in French, for a complete newbie they are not the easiest thing to follow. So here is a way to install all the themes anyone should be able to follow:

1. Add the repository
a. System > Administration > Software Sources
b. Click on the "Third Party Software" tab
c. To add the repository, Click "Add" and copy:

deb http://ppa.launchpad.net/bisigi/ppa/ubuntu jaunty main

d. Click "Add Source"
e. Open Applications > Accessories > Terminal
f. To enter the key, copy (Ctrl+C) & paste in Terminal (Ctrl+Shift+V)

sudo apt-key adv --recv-keys --keyserver keyserver.ubuntu.com 0x1781bd45c4c3275a34bb6aec6e871c4a881574de

g. Go back to the "Software Sources" window and click "Close" and then "Reload" in the pop-up

2. Install the Themes
a. To update the source list, in the Terminal window type

sudo aptitude update

b. The install the themes by typing

sudo aptitude install zgegblog-themes

To check out your new stuff, just right-click on your desktop and click "Change Desktop Background", you now should have 10 new themes and backgrounds to choose from!

Etichette:

08 giugno, 2009

Office Wine

"I want to make the world a better place for me to live in." - Lucy in Peanuts

I work in the real world. However much I may want to work in Linux, I will always work with real people...and apparently real people use Microsoft Office! So I needed to install Office on my Ubuntu Jaunty system. Being somewhat lazy, busy with work, travelling the world (been in 11 countries this summer), I have been putting off this post about how I successfully installed Office in Ubuntu. Unfortunately, for the longest time I was just as unsuccessful in doing the same for my wife, but now I have succeeded in that as well, so here you go! These instructions are quite self explanatory, and don't actually need any editing of my own! The only thing to mention is that I had no problems using the latest stable version of Wine, so it is a little easier than Saman makes it out to be!

P.S. It turns out the installation had some bugs, so if you experience some glitches you want to try the previous guide!

Etichette:

19 maggio, 2009

Rockin Firefox 3.5

“If it ain't broke, don't fix it' is the slogan of the complacent, the arrogant or the scared." - Colin Powell

A mere day after Chromifox...I had to move on. The features I liked didn't depend on this GUI, and in fact, I was quite bothered by the Title bar being a different color, and there was no good way to get rid of the title bar without loosing functionality (like being able to move the window). Beyond that, the Chromifox Extreme theme kept messing up menu navigation (menu items would disappear if I moved the mouse too fast). Finally, there are some nice functions, tweaks, and extensions, that I like.

So here we go again:

1. Install Chromifox Basic Theme - simpler and prettier

2. Overly Nit-Picky Tweaks
a.Adjust the size of the url font
i.Navigate to /home/USER/.mozilla/firefox-3.5/adeikskt.default/chrome
ii.Open userChrome-example.css
iii.Add the line
#urlbar {font-size: 80% !important;}
b.Adjust url-Autocomplete font color and size settings
i.Open userChrome-example.css (see previous step if you happened to close it)
ii.Add
.ac-comment {font-size: 100% !important; color: #444444 !important; }
.ac-comment[selected='true'] {font-style: bold !important; color: #444444 !important; }
.ac-url-text {font-size: 100% !important; color: #444444 !important; }
.ac-url-text[selected='true'] { color: #444444 !important; }

c.Save as userChrome.css
d.Close all Browser windows and reopen Shiretoko.

Etichette:

18 maggio, 2009

Chrome + Firefox = Chromifox?

"A zebra does not change its spots." - Al Gore

The hardest thing about switching from Windows to Linux has been the browser. Firefox is nice, and has some nice features, but I had gotten so used to Chrome...and it's minimalism! I loved having so much viewing space, that wasn't being taken up by buttons and menus I never use. I tried to get Chrome, but:

-Supposedly, one day, Chrome will be available for Linux...but not yet.
-The ported version of Chrome doesn't work all that smoothly.
-Though you can get Chromium still has too many bugs.

None of this changes the fact that I want more screen space. So I had to figure it out myself, and along the way tweaked a few things to take advantage of what Firefox has to offer. Here is what I did in Ubuntu 9.04 (Jaunty):

1. Upgrade to Firefox 3.5 (codename Shiretoko)
a.Open System/Administration/Synaptic Package Manager
b.Search for Firefox 3.5
c.Click the check box to Mark for Installation
d.Accept all dependencies
e.Open Applications/Internet/Shiretoko Web Browser

Firefox 3.5

2. Install the Chromifox Extreme theme.

Chromifox

3. Install Add-ons:
a.Hide Menubar - press Alt to show the Menu.
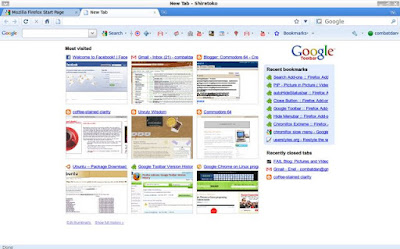
b.Google Toolbar - gives the Chrome New Tab page as well.
c.Auto Hide Status Bar

Chromifox with Add-ons on New Tab

4. Basic Tweaks
a.Move Search Bar
     i.right click next to Address Bar
     ii.click Customize
     iii.simply drag the search bar elsewhere (i.e. the Bookmarks Bar)
     iv.click Done
b.Hide Google Toolbar & Bookmarks Toolbar
     i.right click next to Address Bar\
     ii.uncheck Google Toolbar & Bookmarks Toolbar

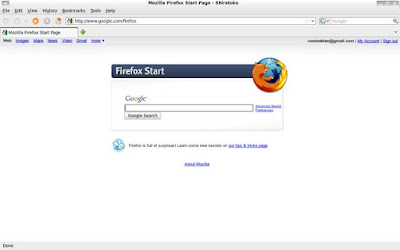
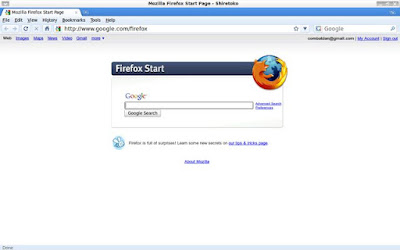
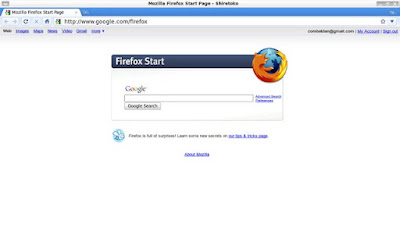
Firefox completely Chromified

So there you have it! Looks and behaves nearly identically to Chrome!

Etichette: , ,

17 maggio, 2009

Ricominciamo - Let's Start Over

"In the beginning [...again...]" - Genesis 1:1

So the little old Gateway notebook I installed Ubuntu on, has received much attention from my 4-year-old who now has a computer to play Nick Jr. games on. The once slow computer - that Natalie refused to play her computer games on - now runs better than it ever has....meaning I no longer have a machine to learn the ways of Linux. For this very reason, my Acer Aspire 5920 has become my new Linux project.

A new version of Ubuntu just came out, so I went ahead and downloaded Ubuntu 9.04 (Jaunty)...which in retrospect is where ALL the following turmoil began.

Still unsure of moving to a new operating system, I didn't really want to mess with creating new partitions and all that jazz. So, I used Wubi to install Ubuntu in Windows Vista, which gives the option to uninstall it at any time in the same way you do any other ordinary program. The downside of Wubi is that you can't come back from hibernate or suspend the system - something I do several times a day on my notebook. Turns out, I like Linux...I really like Linux! Fast, Stable, and Pretty!

So I uninstalled Ubuntu through Wubi, and learned how to create a partition using EASEUS. The software worked very well, and would highly recommend it to anyone that wants a windows based partitioning application...of course I have since discovered GParted, so you may just want to use that if you want to dual boot Linux & Windows.

Anyway, I popped my Ubuntu 9.04 CD in, and installed the new OS on the new 17 GB partition...well almost. I got this error:

The installer encountered an error copying files to the hard disk:<br /><br />[Errno 5] Input/output error<br /><br />This particular error is often due to a faulty CD/DVD disk or drive, or a faulty hard disk. It may help to clean the CD/DVD, to burn the CD/DVD at a lower speed, to clean the CD/DVD drive lens (cleaning kits are often available from electronics suppliers), to check whether the hard disk is old and in need of replacement, or to move the system to a cooler environment.

I searched and searched and searched forums, google...and the internet at large for a solution. I deleted the partition to let the installer figure it out. I created separate boot and swap partitions. I removed a RAM stick for the installation. I tried in the morning, afternoon, evening, and middle of the night...but no matter what, the installer stopped at 37% and gave me the dreaded


...aaaahhhh!

But the story is NOT over! I thought I would try the 64 bit version, and this time (for no apparent reason) I downloaded the .iso image torrent. The installation...was very tense...but then it hit 38...39...40.....100%! OK, so the 64 bit version gave my video card problems, but at least I know the problem is not MY hardware! I quickly decided I needed the 32 bit version. I tried my other -now overused- Ubuntu CD...the installation stopped at 37%...for the 172nd time!

As far as I can tell, the problem is actually in the .iso image on the Ubuntu site. I downloaded the image torrent, which by the way is a much faster download. And the installation went without a glitch!

I now have fully functional Windows Vista and Ubuntu 9.04 on my machine. I can boot either, and waking the computer up from hibernation I can "wake up" either OS, which is very handy for the moment.

Etichette: ,